blogging tips

  • How to Start a Blog From Scratch in 2026 (Step-by-Step for Beginners)

    Starting a blog can feel overwhelming, especially if you’ve never done it before and aren’t sure where to begin. If you’re wondering how to start a blog from scratch in 2026, you’re not alone. With so many platforms, tools, and opinions available, it’s easy to get stuck before you even publish your first post.

    I’ve got good news! Blogging is still one of the most accessible ways to build an online presence, share your expertise, and create an income stream. You don’t need to be tech-savvy, have a large following, or spend months planning. What you do need is a clear, beginner-friendly roadmap that walks you through each step without the confusion.

    starting a new blog; how to start a blog; how to become a blogger; how to blog; what is a blog; should I blog: can I make money with a blog?

    In this step-by-step guide, you’ll learn exactly how to start a blog from scratch, even if you have no prior experience. We’ll cover what’s changed about blogging in 2026, the essential tools you actually need, and the foundational steps that set your blog up for long-term growth—so you can move forward with confidence and clarity.

    What is a Blog?

    If you’re new to blogging, it helps to understand what a blog really is. A blog is a website where you post written content on a regular basis. In 2026, blogs are not just online journals. They are places where people share ideas, teach others, and build trust with readers over time.

    Many beginners think they need to be great writers, tech experts, or have a large audience before they start a blog. Not true. You don’t need special skills or experience to begin. If you can explain something you know, share a story, or help someone solve a problem, you already have enough to start.

    Starting a blog “from scratch” does not mean doing everything at once. It means picking one main topic, setting up a simple website, and adding content as you go. You don’t need a perfect design or dozens of posts right away. What matters most is getting started and staying consistent.

    Blogging is a good choice for beginners because it is flexible. You can blog as a hobby, to support a business, or to earn extra income over time. You can work at your own pace and grow your blog step by step.

    If you’ve been waiting until you feel ready, now is a good time to start. Every blogger begins as a beginner. The best way to learn blogging is by starting and learning as you go.

    how to start a blog from scratch; work from home; freelancing gigs; woman sitting in floor working on laptop; beginner blogging guide; start a blog step by step; start a blog for beginners how to create a blog

    Blogging for Beginners in 2026: What’s Changed

    When I started blogging many years ago, it was more as a hobby. It was fun to write about things I was doing, like keeping a journal. But as my little blog grew, I learned that blogging has changed a lot over the years. However, the main idea is still the same: helpful content wins. In 2026, blogs are less about posting often and more about creating content that answers real questions and solves real problems. Readers expect clear, useful information, and search engines reward blogs that deliver it.

    AI now plays a bigger role in blogging, especially for research, outlines, and editing support. However, AI does not replace original ideas or personal experience. Search engines are focused on search intent, which means they care more about how well your content matches what someone is actually looking for—not just which keywords you use. Good SEO today is about clarity, structure, and usefulness.

    Long-form content still matters because it allows you to cover a topic fully in one place. Well-written, in-depth posts tend to rank better, build trust with readers, and keep people on your site longer. One strong, helpful post can outperform several short, rushed ones.

    For beginners, the focus should be simple: choose one clear topic, write helpful posts, and learn the basics of SEO without overthinking it. You do not need to master every tool or trend. Start with quality content, consistency, and a willingness to improve as you go.

    How to Start a Blog from Scratch Step by Step

    Learning how to start a blog from scratch is easier when you break the process into simple steps. Don’t try to do everything at once. It will cause you to become overwhelmed, stressed, and burned out, which is why a lot of bloggers quit in the very beginning. This section walks you through each part in order, from choosing your topic to setting up your site.

    Step 1 – Choose a Blog Niche

    A blog niche is the main topic your blog focuses on. Instead of writing about everything, you choose one general area so readers and search engines know what your blog is about. A clear niche makes it easier to attract the right audience and decide what to write about.

    Beginner-friendly niche examples include:

    • personal finance basics
    • simple home organization
    • beginner fitness
    • easy recipes
    • parenting tips
    • homesteading
    • faith-based encouragement
    • learning a new skill

    The best niches are ones you’re interested in and can write about consistently, even as you continue learning.

    A common mistake beginners make is choosing a niche that is too broad, like “lifestyle” or “everything I’m interested in.” Another mistake is picking a niche only because it seems profitable, without any real interest in the topic. Focus on clarity, not perfection. You can always narrow your niche as your blog grows.

    Step 2 – Choose the Right Blogging Platform

    A blogging platform is the tool you use to create and manage your blog. Some popular options for beginners include WordPress, Wix, Squarespace, and Blogger. Each has its pros and cons, but the right platform depends on your goals, budget, and technical comfort level.

    WordPress is the most popular choice for beginners who want flexibility and long-term growth. It’s easy to use, works with many themes and plugins, and gives you control over your blog as it grows. You don’t need to be a developer to get started, and there are plenty of tutorials to guide you. (It’s what I use for all my blogs and have been using for years.)

    You can start with a free platform, which is easy and low-risk, but free blogs often come with limitations, like restricted design options, ads, and less control over your domain. A self-hosted blog (like WordPress.org) costs a little more, but it gives you full control, a professional domain name, and more opportunities to grow and monetize your blog.

    For beginners, starting with a self-hosted WordPress blog is usually the best long-term choice.

    Can’t decide which is best for you? Check out my guide on WordPress.com vs WordPress.org.

    Step 3 – Pick a Domain Name

    Your domain name is your blog’s address on the web, like http://www.yourblogname.com. It’s one of the first things readers notice, so choosing the right one matters. A good domain is easy to remember, easy to spell, and reflects your blog’s focus.

    When picking a domain, think about branding versus keywords. A brandable name is unique, catchy, and helps you stand out, while a keyword-focused name tells people (and search engines) exactly what your blog is about. You can combine both, but avoid long, confusing names.

    Common mistakes include:

    • using numbers
    • using hyphens
    • using complicated words that are hard to type
    • copying another blog’s name
    • choosing something too trendy that might feel outdated quickly

    Keep it simple, clear, and easy to remember so readers can find your blog without any trouble.

    Once you come up with a name, you need to make sure the name you want is available. These sites offer a free domain name search:

    Step 4 – Set Up Hosting

    Web hosting is the service that stores your blog’s files and makes them available online. It’s where your blog “lives”. Think of it as renting space on the internet for your blog. Without hosting, your blog won’t be visible to readers.

    For beginners, all you need is a reliable, beginner-friendly hosting plan. Most hosting providers include one-click WordPress installation, email support, and basic security features—everything you need to get started without technical headaches. You don’t need the most expensive plan at first; a basic shared hosting plan is enough for a new blog. In terms of cost, beginner hosting usually runs between $3–$10 per month, depending on the provider and plan. Many providers also offer discounts for the first year. Choosing good hosting early can save you headaches later, so pick a reputable company that makes setup and support simple. (Many bloggers prefer BlueHost.)

    Check out my guide on the best hosting services for beginner WordPress blogs.

    blogger working on laptop; woman typing on laptop; work from home; freelance gig; how to start a blog; how to write a blog; blogging for beginners; Creative Blogging 101

    How to Create a Blog That’s Ready to Grow

    Once you know how to start a blog from scratch, the next step is learning how to create a blog that can grow over time. This means more than just setting up a website. It’s about building a blog that looks professional, is easy to navigate, and is set up to attract readers from the start. A blog ready to grow has the right structure, essential pages, and a simple design that lets your content shine. By focusing on these basics early, you’ll save time and make it easier to expand your blog in the future.

    Install WordPress and Essential Settings

    Once you’ve chosen your hosting, it’s time to install WordPress. (WordPress makes creating and managing your blog easy.) Most hosting providers have a one-click WordPress installation, so you don’t need any technical skills. After installing, your blog will have a basic structure you can start customizing right away.

    Here’s a simple setup checklist for beginners:

    • Choose a blog title and tagline
    • Set your preferred time zone and language
    • Check your permalink settings so your URLs are simple and easy to read (this is important!) To do this: in your WordPress dashboard, hover over “Settings” then click “Permalinks.” Choose “post name.” This gives you a better chance of ranking higher in search engines, plus makes it easier for readers to find your posts.
    • Add your first user account (usually your own)

    It’s also important to protect your blog with basic security measures. Start with a secure password, limit login attempts, and install a simple security plugin if your host allows it. Don’t forget backups! These save a copy of your blog in case something goes wrong. Most hosts offer automatic backups, or you can use a free plugin to make sure your work is safe.

    I tell you exactly how to install WordPress in this guide.

    Choose a Simple Blog Design

    When setting up your first blog, how it looks is important, but it doesn’t need to be complicated. One of the blogging basics for beginners is keeping your design simple and easy to navigate while still looking professional.

    Start by picking a theme, which is a ready-made template that controls the layout, colors, and fonts of your blog. Themes make it easy to get started, and you can make small customizations without touching any code. Avoid adding too many colors, fonts, or widgets, because overdesign can make your blog confusing for readers and can slow down your entire site.

    I use a paid theme for all my websites from BluChic, and I love it! It’s easy to install, and everything is laid out for you, so all you have to do is change the text and images.

    Your blog also needs to be mobile responsive, meaning it adjusts automatically to phones and tablets. A responsive design ensures your blog looks good and works well on any device.

    By focusing on a clean, simple layout with just a few thoughtful customizations, you’ll create a blog that’s easy to read, professional, and ready to grow—an essential step in learning how to start a blog from scratch.

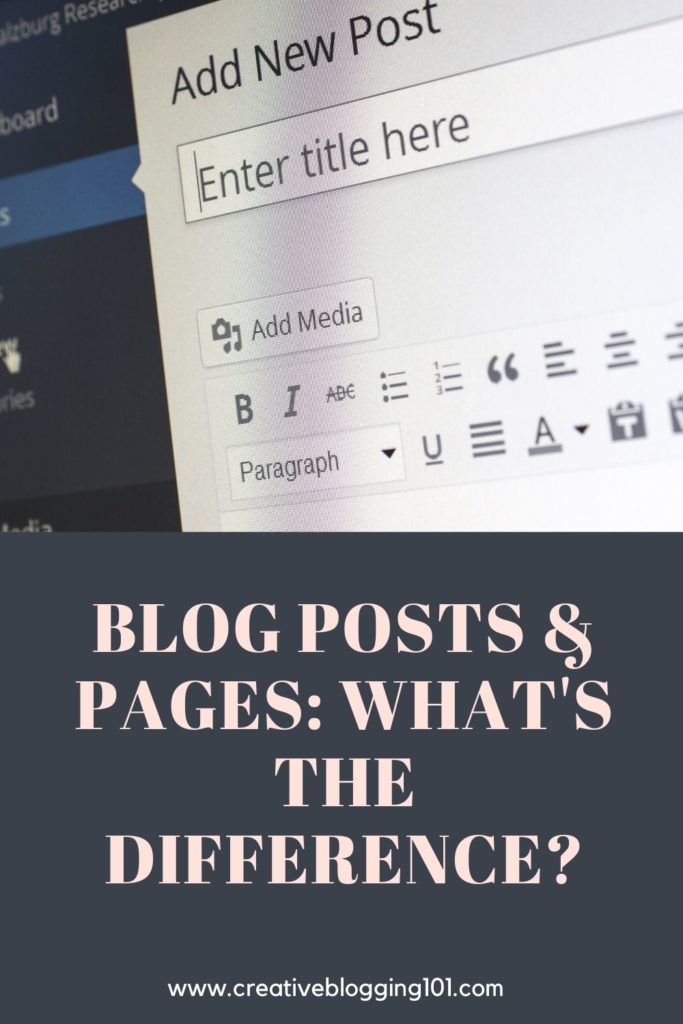
    Create Essential Blog Pages

    It’s important to add a few essential pages that help your readers understand your blog and trust your content. These pages make your blog feel complete and professional, even for beginners.

    • About Page: This is where you tell readers who you are and what your blog is about. Share a little about yourself, your goals, and why you’re writing. A clear About page helps visitors connect with you and your content.
    • Contact Page: Make it easy for readers, potential collaborators, or brands to get in touch. Include a simple contact form or your email address. A Contact page shows that you’re approachable and serious about your blog.
    • Privacy Policy / Disclaimer (Disclosure): These pages protect you and your readers. A Privacy Policy explains how you handle visitor information, while a Disclaimer or Disclosure covers things like advice or affiliate links. Even simple templates are enough for a new blog.

    Adding these pages early gives your blog a strong foundation and shows readers that your site is trustworthy, organized, and ready to grow.

    woman working on laptop; work from home; freelance gig; how to start a blog from scratch; start a blog for beginners; blogging for beginners; start a blog step by step;

    Beginner Blogging Guide: Writing Your First Posts

    Now it’s time to talk about writing because a beginner blogging guide isn’t complete without tips on writing your first posts. Starting out can feel terrifying, but it’s easier than you think if you focus on simple, helpful content. And when you’re learning how to start a blog from scratch, you need to know every detail possible for long-term growth.

    What to write first
    Start with posts that introduce your topic and share your knowledge or experience. You could write a “Welcome” post explaining your blog’s purpose, a post answering common questions in your niche, or a simple how-to guide. Your first posts don’t have to be perfect. They’re just a starting point.

    How many posts to start
    You don’t need a huge library before going live. Aim for 3–5 quality posts so visitors have something to read when they arrive. This gives your blog enough content to feel useful while letting you add more posts consistently over time.

    Basic SEO for beginners
    Use keywords naturally in your titles, headings, and a few times in the text. Add meta descriptions for each post and use descriptive image alt text. Don’t overthink it! Focus on helping your readers find value in your content.

    Formatting for readability
    Break your text into short paragraphs, use headings and subheadings, and include bullet points or numbered lists when possible. A clean, easy-to-read layout keeps people on your blog longer and makes your content easier to understand.

    See also: Elna Cain’s amazing course WriteTo1k

    Blogging Basics for Beginners: What to Do Next

    Once your first posts are live, it’s time to focus on what comes next. These blogging basics for beginners will help you build momentum and grow your blog without feeling overwhelmed.

    How Often to Publish
    Consistency matters more than quantity. Start with one or two posts per week or every other week—whatever you can manage without burning out. The key is to stick to a schedule so readers know when to expect new content.

    Promoting your Blog (without overwhelm):
    Share your posts on social media, join niche communities, or connect with other bloggers. You don’t need to be on every platform. Just pick one or two that fit your audience and focus on them. Simple, steady promotion works better than trying to do everything at once.

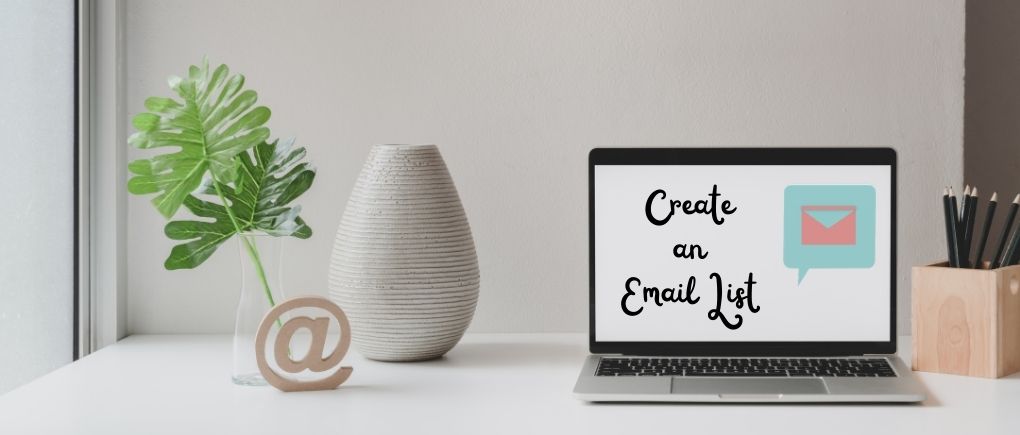
    Starting an Email List Early
    Even if your blog is new, begin collecting emails from day one. An email list helps you stay in touch with readers, share updates, and grow your audience. Offer a small freebie, like a checklist or guide, to encourage sign-ups.

    I use Kit to send newsletters and emails to my subscribers. They have easy-to-use templates, which make emailing updates to your subscribers really fast and simple.

    Tracking Basic Metrics
    Keep an eye on simple stats like page views, popular posts, and traffic sources. Free tools like Google Analytics or your hosting dashboard can help. Tracking metrics shows what works, so you can create more of the content your readers love.

    woman typing on laptop; working from home; how to start a blog from scratch; blogging tips for beginners; beginner blogging guide; how to create a blog; start a blog step by step; Creative Blogging 101

    Can You Make Money Blogging in 2026?

    Can you actually make money from blogging? If you’re learning how to start a blog from scratch, it’s important to have realistic expectations. Blogging can make money, but it usually takes time, consistent effort, and a focus on providing value before income comes. Most new bloggers don’t see large profits right away, but even a small, steady income is possible as your audience grows.

    Beginner Monetization Options
    Once your blog has a few posts and a growing audience, there are simple ways to start earning, including:

    • affiliate marketing (recommending products you use)
    • offering a small digital product like a guide or template
    • displaying ads through beginner-friendly networks

    You don’t need a huge following to start testing these options.

    What to Focus on Before Monetizing
    Before thinking about money, focus on building your blog’s foundation. This means creating helpful content, growing an email list, and learning basic SEO. A blog with engaged readers and a clear niche will naturally perform better when you introduce monetization.

    Common Beginner Blogging Mistakes to Avoid

    Starting a blog can be exciting, but beginners often make mistakes that slow their progress. Knowing what to watch out for can save you time and frustration. Avoiding these common mistakes helps you stay on track and build a blog that grows steadily over time.

    • Trying to do everything at once. Many new bloggers want to perfect their design, write dozens of posts, and master SEO all at the same time. Focus on one step at a time—set up your blog, publish a few posts, then improve as you go.
    • Ignoring SEO. Even a helpful blog won’t reach readers if no one can find it. Basic SEO, like using keywords naturally, writing clear headings, and adding meta descriptions, helps your content get discovered without being overwhelming.
    • Inconsistent publishing. Skipping weeks or months between posts makes it harder to build an audience. Pick a schedule you can stick to, even if it’s just one post per week, and stay consistent.
    • Giving up too soon. Blogging takes time. Many beginners quit before they see results. Growth comes from regular posting, learning from mistakes, and gradually improving your blog.

    Frequently Asked Questions About Starting a Blog

    Is blogging still worth it in 2026?
    Yes! Blogging is still a powerful way to share your ideas, build an audience, and even earn extra income. While social media is popular, blogs give you control over your content, help you establish authority, and allow your content to be discovered through search engines over time.

    Can you start a blog for free?
    Yes, you can start a free blog on platforms like WordPress.com or Blogger. Free blogs are a good way to practice and learn, but they come with limitations, such as fewer design options, ads, and less control over your domain. For long-term growth, a self-hosted blog is usually a better choice.

    How long does it take to make money?
    Making money from a blog usually takes time and consistent effort. Most beginners don’t earn much in the first few months. Depending on your niche, content, and promotion, it can take 6–12 months to start earning a steady income. Focus first on building helpful content and growing your audience.

    How much does it cost to start a blog?
    You can start a blog for as little as $3–$10 per month for hosting, plus a domain name that typically costs around $10–$15 per year. Additional costs might include a premium theme or tools, but you can start with free resources and upgrade later as your blog grows.

    Final Thoughts: How to Start a Blog From Scratch (Without Overwhelm)

    Starting a blog can feel overwhelming and intimidating, but the most important step is simply to begin. Remember, you don’t need to have everything perfect from day one. Focus on progress, not perfection, and take things one step at a time. Learning how to start a blog from scratch isn’t as hard as you might think.

    Pick a niche, set up your blog, write a few helpful posts, and learn as you go. Each post you publish, each page you create, and each small improvement you make brings you closer to a blog that grows and succeeds.

    Blogging is a journey, and beginners can start small while building skills and confidence along the way. By following this beginner blogging guide and focusing on simple, practical steps, you can start your blog without overwhelm and create a site that’s ready to grow over time.

    Now it’s your turn: take the first step, start writing, and watch your blog come to life.

  • The Most Important Things You Need to Focus on During Your First Year of Blogging

    Starting a blog can be overwhelming. During the first year of your blogging journey, you shouldn’t let yourself get overwhelmed with all the information out there. This post contains the only things you need to focus on during your first year of blogging. Keep reading to see what they are!


    You’re probably here because you just started a new blog and now you have no idea what to do.

    And that’s ok! I had no idea what to do after I started my first blog, either.

    It took a lot of research over a lot of years to figure it all out.

    I got frustrated and I almost gave up and deleted my entire blog.

    And I’m not the only one. Did you know that 95% of people who start a blog fail in their first year blogging and give up?

    That’s a lot of new bloggers becoming overwhelmed with how much work actually goes into blogging!

    what you need to focus on during your first year blogging

    Yes, having a successful money-making blog is a lot of work and does take time and patience. But I don’t want you to get frustrated and give up as a new blogger! That’s why I put this list together of the most important things you need to focus on during your first year of blogging.

    The Most Important Things to Focus on During Your First Year of Blogging

    *Post contains affiliate links. They are free for you to click on, however, I will be compensated if you make a purchase. This supports my family and I thank you for your support! To learn more, click here.

    1. Have a plan for your blog.

    Having a plan for your blog from the very beginning will save you a lot of time and frustration. If you start writing without any planning in place, your blog will fail. And you will have wasted a whole lot of time. I made this mistake in my first year blogging and I gave up blogging for a while. This is my best tip for new bloggers!

    It’s super important to sit down and come up with a plan and some goals so your blog will become a success.

    How to define your blogging goals:

    1. Brain dump: Grab a notebook and write down all of your blogging thoughts, plans, goals, fears, and concerns. Get everything out. Trust me – it works and it makes you feel better! Keep in mind this is just a brain dump for overall blogging goals, not ideas for posts right now.
    2. Organize your thoughts: Draw a line down the center of a piece of paper. On the left side of the paper write “annual blogging goals” and on the right side write “ultimate blogging goals”. Go through your brain dump list and start sorting ideas into these two categories.
    3. Get S.M.A.R.T.: Now it’s time to set realistic and reachable goals, which you’ll find examples of all throughout this post. Examples of some goals are setting up an email address, getting 500 subscribers to your email list in the first 6 months, and so on.
      SMART stands for
    • Specific
    • Measurable
    • Achievable
    • Relevant
    • Time-based
    Define your blogging goals

    2. Set up your blog the right way.

    I know what you’re thinking, “What? I’ve already set up my blog!”

    There’s more to a blog than having a domain name and host and installing WordPress.

    Here are a few things you should focus on during your first year of blogging to get your blog set up correctly:

    1. Choose a theme: The theme is the template for the look and layout of your site. It’s where all of your brand colors and fonts come together in a user-friendly way.
      • Choosing a blog theme is important, but it’s not something you should spend a lot of time on in the beginning. You’ll always be improving the overall look of your site.
      • WordPress has free themes you can use or you can choose to go with a premium theme, which is not free. These are updated a little more frequently and have less of a chance of breaking down on you. But a free theme is the way to go when you’re first starting out with your blog.
      • Tips for choosing a theme:
        • It should be lightweight, not overloaded with plugins and data that is just going to slow it down.
        • It needs to be mobile-friendly.
        • It should be easy to customize.
    2. Set up categories: Categories are how you sort and group your blog posts into different sections.
      • To set up categories, go to your WordPress dashboard, then under “posts” click “categories” then “add new”. Name your category, set a slug, choose a parent category (only if this is a subcategory), set a basic description, then click “save”. (Learn the differences between categories and tags here.)
    3. Set up your main pages: Click here for information on all the pages you need to have on your blog and why they’re important. Setting up these pages is very important to focus on during your first year of blogging and I would recommend setting them up right away. These blog pages include:
    4. Create your menu: The menu sits at the top of your blog and is the best way to help readers navigate through your blog. You can add pages, posts, and outside links to your blog menu.
      • To create your menu, go to your WordPress dashboard and click on “appearance” then “menu”. Give your menu a new name (something like top menu or whatever), then save it.
      • Next, choose the pages your want to add from the left column and drag and drop them however you want them to show up on your blog.

    3. Set up Google Analytics.

    Google Analytics is a free tool provided by Google to help you track the traffic that comes to your blog.

    With Google Analytics, you can learn all about audience behavior on your site, such as their:

    • interests
    • demographics
    • the pages they visit the most
    • and more!

    Studying audience behavior through Google Analytics gives us bloggers the power to grow our blogs as well as serve our readers the best we can.

    You can learn everything you need to know about Google Analytics in this super helpful guide written Moz.

    what to focus on during your first year of blogging - create an email list

    4. Create an email list.

    Having an email list is the best way for your readers to get your posts. More than likely they are not going to remember to visit your blog every day to see if you’ve written a new post. To get them to see and read what you’ve written, you need to send them an email sharing that information. You should never depend solely on social media to share your blog.

    Creating an email list is one of the most important things to focus on during your first year of blogging. Aim to get at least 500 subscribers in your first blogging year.

    Why is having an email list so important for your blog?

    Email subscribers are more likely to share your content than they would if they saw your post on Instagram.

    Also, people signed up to get your emails for a reason – they’re interested in what you have to offer. Having an email list makes it easier to target the right people for offers and products.

    Best free email marketing tool:

    Most bloggers use ConvertKit for their email marketing. They are very user-friendly, their sign-up forms are customizable, and it’s FREE to sign up!

    How to build your email list in your first year of blogging:

    Step 1: Offer an incentive

    Incentives are often referred to as “lead magnets“. When visitors come to your site and see that they are going to get something free just for joining your email list, they are going to sign up. Everyone loves free stuff!

    They need to be useful, solution-focused, and goal-driven. If your incentive is not useful and doesn’t solve the reader’s problem, they are not going to bother signing up for it. Also, ask yourself where does the free incentive sit in your sales funnel? If you have a product to offer for sale, be sure the opt-in form leads subscribers to your product landing page after they sign up.

    Types of incentives to offer include:

    • checklists
    • eCourses
    • eBooks
    • video tutorials
    • workbooks
    • planners
    • calendars

    Step 2: Add opt-in forms to your blog

    Create eye-catching and conversion-focused opt-in forms with bold colors and fonts to attract attention. Be sure to place forms in strategic places throughout your blog, such as within every blog post and in the sidebar widget.

    Pop-up forms that catch people when they are about to leave your site are perfect attention-grabbers. Make sure they know what they are going to miss if they leave your site without signing up for your email list.

    5. Create valuable content.

    One of the main things to focus on during your first year of blogging is creating valuable content that attracts readers. Find topics that people are interested in and want to know more about. Search a topic on Google and look at the questions that pop up in the “People also ask…” box. Use those questions as questions you can answer in blog posts for readers.

    As a new blogger, you should get into the habit of writing every day. That doesn’t mean you should post a new blog post every day! But you should be focused on writing something, even if it’s just to rewrite and make an older post better. Aim for at least 2 blog posts a week and remember to remain consistent with your posts.

    Not every blog post needs to be SEO-focused and filled with a lot of keywords. During your first year of blogging, you should focus more on having content written and shared. Focusing on SEO and keywords will come later.

    Best types of content to write

    The best types of posts to write are called “pillar posts“. Pillar posts are meaty, useful, well-written posts that are engaging. They are usually filled with relevant images and helpful videos to help readers understand what’s going on. Topics in pillar posts are covered in-depth so much that people will link to them for years to come.

    Examples of pillar posts include:

    • “how-to” posts
    • lists
    • roundups
    • ultimate guides
    • definition articles (explain certain topics such as content marketing very in-depth)

    Comments count toward long-form content, too. Ask a question at the end of your post to get readers engaged.

    Related: 6 Steps to Take After Publishing a Blog Post

    6. Start monetizing your blog

    I would highly recommend that you start monetizing your blog during your first year of blogging. Don’t make the mistake of waiting until after you have published a ton of posts like I did. I spent months going back through posts and adding in affiliate links. This is so much easier if you start monetizing your blog from the beginning.

    What are the best ways to monetize your blog during your first year of blogging?

    1. Affiliate Marketing: Affiliate marketing is promoting someone else’s products. For example, sharing links to Amazon products within your blog posts. If someone clicks one of your links and makes a purchase you will receive a small commission.
      • Start off by promoting 1-2 affiliates directly related to your niche. To promote these affiliates you can write affiliate-related articles or place affiliate links within related blog posts. Also, you can place affiliate banners on sidebar widgets with eye-catching graphics. Be sure to promote affiliate links to your email list and on social media as well.
    2. Create a product to sell: Digital products are very popular right now. People are buying eBooks and printable planners now more than ever.
      • Types of products to create and sell include:
        • Digital products such as calendars, planners, eBooks, eCourses, copyright-free images
        • Services such as one-on-one consulting, coaching, photography, vacation planning
      • Before creating a product to sell to your audience, ask yourself these questions:
        • What does your target audience really need/want?
        • What questions do they have?
        • How can you solve the problems they are facing?
    3. Sponsored posts: Sponsored posts are articles that a company or brand pays you to write. You must include links to their products and services within your post. Reach out to brands and companies you love and trust. It’s best that you actually use their products so that you can share your honest review with your audience to build a trusting relationship with them.

    7. Drive traffic to your blog

    The main ingredient to a successful money-making blog is traffic. The more visitors you have, the more people you have to click on affiliate links and ads and buy your product(s). It can take up to 6 months for Google’s algorithms to fully index your site and for your blog to start ranking in top search results.

    During your first year of blogging, you should be focused on driving traffic to your blog through Pinterest and social media. Also, make sure to read and comment on other blogs. You may get lucky and gain new followers.

    Backlinks are another great way to drive traffic to your blog. Getting links to your blog from other sites with a higher domain authority will help you rank higher and quicker on Google. (Domain authority is a search engine ranking score developed by Moz that predicts how likely a site is going to rank in search engine results pages. The scores range from 1-100).

    Related: 20 Proven Strategies to Drive Traffic to Your Blog

    8. Start niching down.

    When you first start blogging, you might write about different topics to see what interests your audience the most. After writing several blog posts and studying Google Analytics, you start niching down and choosing your target audience.

    Niching down to a specific topic helps you rank in Google quicker and higher because Google can understand what your blog is about. Readers will also know exactly what your blog is about. And the ones who are most interested in the topic you’re writing about will sign up for your emails and keep coming back to read more.

    Also, when your blog is niched down, it tends to get more traffic from Pinterest.

    To niche down your blog, choose a topic that combines your passion and interests with your experience. Think about who can benefit from your skills. This will help you gain authority and build trust with your targeted audience.

    Related: Finding Your Blog Niche

    Having a successful blog shouldn’t be an overwhelming chore. There are a lot of sites out there jampacked with information on how to make money with your blog. If you try to do too much at once, you will get burnt out and overwhelmed and you will give up and quit. Therefore, your blog will fail and you will have lost valuable time and money.

    The above tasks are the most important tasks that you need to focus on during your first year of blogging if you are serious about having a successful money-making blog for years to come. In the following years you should be putting more focus on learning SEO, Google algorithms, long-tail keywords, and more to keep your blog going.

    If you’re a new blogger, what are your goals to focus on during your first year of blogging? If you’re an established blogger, what did you focus on most during your first year? Is there anything you wish you would’ve focused on sooner?

    pin me
    Most Important Things you need to focus on during your first year of blogging

  • 6 Steps to Take After Publishing a Blog Post

    You’ve written and published your amazing blog post. Now what? If you’re scratching your head trying to figure out what to do next, keep reading! I’m sharing 6 steps to take after publishing a blog post that will bring traffic to your blog and get you noticed!

    If you’re reading this, then you have more than likely already created your blog and you’ve written a few blog posts. 


    Congratulations!

    (However, if you are just curious and haven’t started a blog yet, click here for easy instructions on how to create your own money-making blog.) 

    But now what?  

    I’m sure you want others to read your posts and follow your blog. After all, you put a lot of hard work into it. But how do you get people to know that you’ve written a new blog post? 

    Keep reading for 6 steps to take after publishing a blog post.

    6 Steps to take after publishing a blog post
    steps to take after publishing a blog post

    6 Steps to Take After Publishing a Blog Post

    Following these steps after publishing your blog posts is very important, especially if your blog is a money-making blog. Even if your blog is just a hobby blog, you can still follow these steps to get a larger audience. 

    1. Promote

    Promoting your blog post is simply sharing it on your favorite social media site. Share every post to whichever social media you use the most. I would not recommend trying to use all of them. It just gets overwhelming and it will feel more like a chore that you hate. 

    Choose one social media site to start with, such as Instagram or Pinterest. (Pinterest is my favorite because it brings the most traffic to my site.)

    Also, it’s okay to share one post more than once. If you only write one post a week, break the post up into several sections to share on social media. 

    For example, let’s say you are publishing a blog post about organizing a kitchen pantry. 

    • Monday, share why keeping an organized pantry is so important on Instagram with photos of your messy pantry before and your organized pantry after. 
    • Wednesday, share the steps you took to get your pantry organized with photos. This is also a great opportunity to share the organizers and/or containers you used using affiliate links.
    • Friday, challenge your followers to get their pantry organized, too. 

    Promoting your posts is one of the easiest ways to get your posts noticed and bring in more traffic to your blog. After all, if you’re not sharing your posts with your social media followers, they’re not going to know you posted anything. Unless they’re on your email list, of course. (More on that later.)

    Click here for 14 sites you can promote your blog on for free.

    2. Track your stats

    Make sure you have Google Analytics installed and connected to your blog and that you’re taking advantage of it. It’s a free service that’s easy to use and it provides you with a ton of valuable information about your site. 

    With Google Analytics you can:

    • See how people find your site (organic search, social media, other sites, etc.)
    • Track what people do while they’re on your site (You can see how long they stay on your site, what pages they click through to next, etc.)
    • Gain data on visitors (You can learn their demographics, geography, and general interest – all of which help you learn your target audience.)
    • Figure out the most popular pages on your site (so you can write more of these types of posts)

    After publishing a blog post, you need to be checking your stats for all of this information. Checking your stats can help you learn how to improve your blog and your posts in the future. 

    3. Link to older posts

    Every time you publish a new blog post, you should include a link to that post in older posts that are similar. 

    For example, back to your pantry organizing post. Let’s say you have published a post in the past with a tutorial on how to organize your kitchen cabinets. After publishing a blog post on how to organize your pantry, go back to the kitchen cabinets post and add a link to the pantry post. 

    This is called “internal linking” and is great for SEO. It also decreases bounce rate, which refers to the percentage of visitors that leave your website after only viewing one page on your site. You want visitors to stay on your site for a while and visit other pages. Linking to other posts within posts will make it easier for visitors to find other relevant posts. Plus, it will keep them on your site longer.

    4. Create 3-5 pins for Pinterest

    Pinterest is the best way to get your blog posts seen by thousands of people. 

    I use Canva to create pins for my posts. It’s easy to do and I already have my pin templates set up for my brand. Canva is free to use and they also have a paid version that allows you to access all of their templates and photos. 

    Click here to get a free trial to Canva pro for 30 days. 

    After creating pins for Pinterest, you can schedule them to pin at certain times on the days you choose with Tailwind. This is so easy to do and saves you a lot of time. Tailwind isn’t free, but it is cheap and I would definitely recommend using them to schedule pins. 

    Click here to learn more about Tailwind and try it out for free to see if you like it.

    5. Send out an email

    Having an email list for your blog is a must. I know you’ve heard it all before, but trust me – it’s true. For my other blog, I send out a weekly email with a personal message and links to my latest blog posts. I make sure not to overwhelm my readers and fill up their inbox daily. 

    After publishing a blog post, make sure you’re sending it out to your email list so your readers will know about it. Your loyal followers will be excited to see what you’re up to and they’ll be eager to read what you’ve written. 

    If you haven’t already signed up for email, I would recommend ConvertKit. It’s easy to learn and they have the best customer service! If you ever need help, they respond quickly with answers. Plus, their opt-in forms are so pretty!

    To learn more about ConvertKit and to sign up, click here. They also have a free plan!

    6. Respond to comments

    Publishing a blog post that asks a question will more than likely get you a lot of comments. Make sure you are responding to all the comments as quickly as possible. This is great for SEO as well as for your readers. Nobody likes to be ignored. 

    Responding to comments is a great way to gain relationships with your readers. They’ll see you as a real person that they can relate to. And they’ll appreciate you taking the time out of your busy day to respond to them. 

    To recap:

    6 Steps to Take After Publishing a Blog Post

    1. Promote
    2. Track your stats with Google Analytics
    3. Add a link to the new post within relevant older posts
    4. Create 3-5 pins for Pinterest
    5. Email your list
    6. Respond to comments

    Canva

    canva

    Tailwind

    tailwind

    ConvertKit

    ConvertKit

    More blogging tips:
    20 Proven Strategies to Drive Traffic to Your Blog
    8 Steps You Need to Know to Writing Captivating Content
    Top 4 Ways to Make Money as a New Blogger

    pin me
    6 steps to take after publishing a blog post
  • 8 Steps You Need to Know to Write Captivating Blog Posts

    Writing captivating content for your audience is a great way to turn visitors into dedicated readers. In this post, you’ll learn the 8 steps you need to know to write captivating blog posts.

    Writing a blog post takes more than just a couple of hours, even if you can type quickly and have amazing writing skills. From the time you think of a blog post idea until the time you hit “publish” you’ll be planning and writing the actual post.

    You want visitors to turn into regular subscribers.

    You want visitors to get to the end of your post excited to read more of what you have to offer.

    In order for visitors to keep coming back, you have to write captivating blog posts that they will want to read.

    How do you do that? Keep reading and I’ll show you.

    8 Steps you need to know to write captivating blog posts

    How to Write Attention-grabbing Content

    Before you start writing captivating blog posts, you have to know your audience. You need to know what they are looking for and what problems they have that you can solve for them.

    How do you know what your audience wants? Ask them! Send an email asking for their feedback or give them the option to ask questions that you can answer in a full-length post. Send surveys asking them what they are struggling with.

    Other ways to know what your audience wants are:

    • Pay attention to their comments on your other posts as well as posts of other sites in your niche.
    • Use tools like KeywordTool.io to find popular topics people are searching for.
    • Read reviews of books in your niche on Amazon.

    And if you need some ideas for posts, be sure to check out these 180 blog post ideas for any niche.

    8 Steps to Write Captivating Blog Posts

    Step 1: Plan

    Many bloggers overlook the planning stage, which is really important, especially if you are serious about making money with your blog. Planning blog posts ahead will actually save you time later on.

    Here’s what you need to do during the planning stage before you start writing captivating blog posts.

    • Choose a topic: The topic you choose to write about should be interesting to you. If you’re not interested in what you’re writing about, your audience isn’t going to be interested in reading it. Readers can tell when writers are not enthusiastic about their topic. They’ll pick up on the boredom and leave, maybe to never come back.
    • Write an outline: Outlines are very important when it comes to planning your blog. They don’t have to be detailed or super long, either. It just needs to be a guide to make sure you stick to the topic.
      • An example of an outline should be something like this:
        • Title of Post
        • Introduction (quick summary of what the post will be about)
        • Sections and subsections
        • Conclusion
    • Do your research: I don’t mean copy Wikipedia for every topic you cover on your blog. In fact, only using one source for your research is a bad idea. Make sure you’re choosing the right sources and don’t forget to cite them.

    Step 2: Create a persuasive headline

    The headline is the title of your post and should grab your readers’ attention. It needs to make your audience want to read more and share your work with others.

    Headlines sell the content as well as represent it in social media, emails, and search engines. You want to make sure your title tells exactly what your content is about.

    Don’t try to trick readers into reading your content by using a title that has nothing to do with what you are writing about. This will make them see you as untrustworthy and they will never return to your site.

    If you want visitors to read your blog post, then your headline must answer the question they’ve been needing to be answered for a long time. Let’s say you are a food blogger and your readers want to know about baking measurements. You wouldn’t want your post headline to read:

    “Baking Measurements”

    Instead, you would want something more eye-catching:

    “How to Properly Measure Ingredients When Baking”

    Which one would you click on to read?

    Here are two free headline analyzer tools for you to try:

    Step 3: Write an eye-catching introduction

    The introduction is where you will show your readers that you understand what they are going through. You want to make them feel as though you are reading their minds.

    How do you do this?

    With empathy.

    More than likely you’ve struggled with the very issue that you are writing about. Step into your readers’ shoes write from their prospective. Prove to them that you “get it” and you’re on their side.

    Another tip when writing your introduction is to trigger your audience’s emotions. Think of the feelings you want your readers to experience: joy, sadness, hope, anger, courage, and so on. As you write, feel those emotions yourself and your readers will read them feeling the emotions you desire them to feel.

    Step 4: Write easy-to-read content

    People are skimmers so they need something quick and easy to read. To make your post easy for people to read yet still make them see the main points, use subheadings. Subheadings guide readers to the point your post is trying to make in a clear and enjoyable way.

    Subheadings should stick to your main headline and not get off track. Otherwise, the reader will get confused and leave.

    Another helpful tip to making reading easier is to use bullet points. Bullet points highlight your most important information and are easy to skim through. Keep bullet points to 1 or 2 lines, don’t write paragraphs in them. They’re not sentences, just mini-headlines.

    Step 5: Add images to your post to improve flow

    Visual content is processed faster by the human brain than text. Images tell a story just as much as the words themselves. The internet is becoming more and more about visual content than reading.

    Images are also great for sharing to Pinterest and social media. They also help people “see” what you are writing about, especially if you are writing tutorial posts.

    But don’t go overboard! Too many images may make your site take longer to load, causing visitors to leave.

    There are a lot of free sites out there where you can get high-quality images for your posts. Some I like to use are:

    Step 6: Add a call-to-action

    A good and clear call-to-action is something that stands out and asks your readers to engage with you and take certain action after reading your content. You can use a well-designed button or just simple text.

    Some examples of good call-to-action are asking readers to:

    • leave a comment
    • share your post
    • sign up for your email list
    • purchase your product
    • follow you on social media

    Step 7: Close with a conclusion

    Wrap up your post with a short summary of all that you covered.

    Do not add any new information here. That’s for a whole new blog post.

    Step 8: Edit your post

    Step away from your post for a little while, possibly a day or so. This way you can come back to it with fresh eyes and see what can be done to improve the post.

    Keep these tips in mind when editing your post:

    • Remove all unnecessary words, sentences, paragraphs, etc. The only thing your post needs is what is absolutely necessary to get your point across.
    • Don’t lecture your audience, motivate them. Your readers need to feel that you are on their side, not that you are a condescending know-it-all.
    • Add emotion and energy to your writing. If you are bored with your topic, readers will be, too.
    • Make sure your content is easy to read and flows well.
    • Check to make sure you aren’t contradicting or repeating yourself.
    • Don’t jump back and forth within your writing. Make sure your writing is driving the post forward so it reaches its destination smoothly.
    • Make sure sentences are paragraphs flow effortlessly into the next. A sentence should depend on the ones before it, so your writing will feel less choppy and be easier to understand.
    • Use bold and italics to highlight very important words and sentences, but don’t overdo it.
    • Use bullet points to group related topics together and make them easier to read.
    • Avoid words like “might”, “possibly”, “perhaps”, and “may” when giving advice.
    • Add relevant images, infographics, and screenshots to your content.
    • Make sure you are being consistent throughout your post. Make sure all points in a list belong to the same category and a list of steps is only a list of steps.
    • Fix any typos, spelling mistakes, and/or grammar mistakes. Grammarly is very helpful at picking these out for you.
    • Don’t forget to cite any sources you used and give credit where it is due. Honesty is always the best policy.
    • Read your post out loud to help you catch any run-on sentences and choppy rhythm.

    To Recap

    Writing captivating blog posts for your audience doesn’t have to be hard or take weeks. An amazing blog post that stands out to your readers will take more time to write.

    If you follow the 8 steps above every time you sit down to write it will quickly become a habit. And you will have an amazing blog that everyone will be excited to keep coming back to.

    You’ll drive more traffic to your blog and people will want to share your content with others.


    Do you know all the important pages your blog should have? If not, click here to find out!


    pin me
    8 Steps You Need to Know to Write Captivating Blog Posts
  • The Difference Between Categories and Tags in WordPress

    Learn the difference between categories and tags in WordPress with these definitions and examples.

    Whether you are starting a WordPress blog or have been blogging for a while, categories and tags can be confusing.

    While both can be used to organize your site’s content by topic, there are some major differences between categories and tags.

    In this article, I’ll cover the difference between categories and tags, an explanation of each, and how to create them.

    difference between categories and tags

    Related: Blog Posts and Pages: What’s the Difference?

    The Difference Between Categories and Tags in WordPress

    What are categories?

    Categories are used to group the primary topics together & help your readers understand what your site is really about. They are meant to group your blog posts by general topics. They are kind of like the table of contents of your site.

    WordPress posts are required to have one category. If a category is not assigned to a post, it will go under “uncategorized”.

    Categories are hierarchical, meaning you can have subcategories under each parent category. For example, let’s say your blog’s main topic is Household Tips and Hacks. The main category could be “House and Home” with subcategories such as “cleaning tips”, “organizing tips”, and “home hacks”. This helps organize your site so readers can find what they’re looking for easily.

    How to create categories

    1. In the WordPress dashboard, under Posts, click on Categories.
    2. Fill in all the information for the new category – name, slug, and a description of the category. Then click “add new category“. This is called a “parent category.”

    Let’s use the Household Tips blog as an example.

    • Category name: House and Home
    • Slug: house-and-home
    • Description: Tips and hacks to keep your home clean and organized.

    How to create subcategories

    To create a subcategory, you are going to do the same thing you did to create a category. Only this time you’re going to choose a “parent category“. (For example, “House and Home”.) Then click “add new category“.

    If you have already written a post and want to change the category, simply go to Posts > All Posts and select the post want to change. Choose the correct category and click Save.

    Tips on using categories

    • Start with a few general categories and create more as your blog grows.
    • Be consistent: categories are meant to organize your posts so you don’t want a ton of categories.
    • If you are a new blogger, write down the topics you want to cover on your blog, then group like ones together with categories.
    • Include a description of the category. While not necessary, they are helpful for your readers to understand what the category is about.
    • Capitalize categories names.

    What are tags?

    Tags are more for describing specific details of your posts. These are more like your site’s index words. They lead readers to similar posts and help visitors find related content easily.

    Unlike categories, tags are not automatically assigned nor are they hierarchical. Tags are optional, but they are recommended to help readers find similar content on your blog. When a reader clicks on a tag, the will be taken to the archive page where all the posts with that tag are stored.

    How to create tags

    1. To add tags before writing posts, go to Dashboard > Posts > Tags. Add a new tag name, the slug, and a short description.
    2. To add new tags while writing new posts, add the tags to the tag section on the right side of your screen. All you have to do here is right in the tags you want to use. Keep in mind you want similar posts to have the same tags.

    For example, if you are writing a post for a book review, tags could be something like “fiction”, “mystery”, or whatever fits the post.

    Tips on using tags

    • Use tags liberally – a tag can just describe one section of the post, not a summary of the entire thing.
    • Use the same tags for multiple posts.
    • Have fun with them – you can use longer phrases for tags just as long as they link similar posts together.
    • Use descriptive tags – Use clear tags that are easy to understand. Think about how search engines will understand them.
    • Use lower case letters – not required, but common practice and helps readers determine the difference between categories and tags.

    To recap:

    The differences between categories and tags are:

    • Categories are required, tags are not
    • Categories are hierarchical, tags are not
    • Categories are used to link main topics together while tags are used to link similar posts together
    • Category names should be capitalized, tag names should be lower case
    information on categories and tags

    You might like to read these next:
    180 Bog Post Ideas for Any Niche
    Branding Your Blog: A Step-by-Step Guide
    Important Pages Every Blog Should Have


    pin me
    Difference Between Categories and Tags in WordPress

  • Blog Posts and Pages: What’s the Difference?

    When you are starting a blog in WordPress, the difference between posts and pages can be confusing. In today’s post, I’m going to explain exactly what posts and pages are and when and how you should use them.

    When you start a blog with WordPress, you will see two ways to create content – posts and pages.

    At first, it can be a bit confusing to know when and how you should use each one. When I first started blogging, I had the hardest time keeping these two separated and knowing which one did what.

    It’s important to understand the difference between blog posts and pages in order to make your site more user-friendly.

    Keep reading to learn exactly what blog posts and pages are, when you should use them, and exactly how to use them.

    blog posts and pages

    Related: The Difference Between Categories and Tags in WordPress

    What are blog posts and pages?

    What is a blog post?

    Blog posts are where you share your articles for your readers or your latest updates. They are shown in reverse-chronological order, meaning the most recent post will be shown at the top of the page.

    What is a blog post made up of?

    Blog posts are made up of several different things:

    • Post title: A great title catches the reader’s attention so they’ll want to read your content.
    • Date published: All blog posts show the date the content was published, usually appearing at the top of the post.
    • Written by: This is the author who wrote the blog post.
    • Content: Content is where you write the article you want to share with your readers.
    • Comments: The comments section allows your readers to respond to your content. This is a great way to interact with your readers and get to know them better.
    • Categories: Categories are how you organize your blog posts so readers can find what they’re looking for easily.
    • Tags: Tags help readers locate similar content on your blog.

    What is a blog page?

    Blog pages are used to share important information, such as legal information. Pages are more permanent and do not require frequent updating.

    What is a blog page made up of?

    Blog pages are only made up of two things:

    • Page title: The page title lets your readers know what your page is about.
    • Content: This is where you write the important information you want to share on your page.

    The Main Difference Between Blog Posts and Pages

    Blog posts in WordPress are shown by date on your blog site. They have an official publish date attached to them.

    Posts are listed in reverse-chronological order, meaning the most recent post is shown first to readers visiting your site.

    Blog pages in WordPress are meant to be timeless and have no publish date. They are more permanent and do not require updates often. Some examples of blog pages are an “about” page and a “privacy” page.

    Pages are content that visitors to your blog should always see no matter when they visit. They should be placed somewhere on your site where they can be seen, such as your menu, sidebar, or footer.

    Related: Important Pages Every Blog Should Have

    To recap:

    • Blog posts have a publish date and are for normal blog posts and updates.
    • Blog pages do not have a publish date and are for timeless static content.

    Other Differences Between Blog Posts and Pages

    1. Posts can be categorized, pages are hierarchical

    Blog posts have the option to be put in a category and have tags assigned to them. You can find these options on the right side of the screen beside where you write your blog posts.

    Blog pages do not have categories or tag options. Pages are organized hierarchically, meaning you can have subpages, or “child pages” within a page. This is to help you organize your pages together.

    2. Posts are social, pages are not

    Posts include social sharing buttons and a comments section. They are meant for your audience to interact with you and share your content.

    Pages do not include social sharing buttons or a comment section. You probably don’t want visitors to share your privacy page or comment on your contact page.

    3. Posts have a published author, pages do not

    Blog posts in WordPress usually have the author who wrote the content shown at the top of the post. This is usually found next to the published date, depending on your theme.

    Blog pages do not list an author.

    4. Posts are included in RSS feed, pages are not

    Posts will show up in your RSS feed, which allows your audience to subscribe to your content using an RSS reader.

    Pages do not show up in RSS feed. Only your blog’s latest posts will be seen in an RSS reader.

    I hope you now have a better understanding of the differences between blog posts and pages. It’s really important to know the differences so your site will be easy to read and readers can find what they are looking for. You want your site to be user-friendly because if it’s too hard to navigate, visitors will only visit once.

    infographic
    pin me
    blog posts and pages
  • 180 Blog Post Ideas for Any Niche

    Do you have writer’s block? Are you having trouble figuring out what to write about in your nice? In this post I’m sharing some great blog post ideas to help you overcome writer’s block.

    Let’s face it – we all get writer’s block at some point. We open our notebooks and stare at the blank page for hours before shutting it, frustrated.

    Maybe you have writer’s block right now and have no idea what to write for your next blog post.

    Well, you’ve come to the right place because listed below are 180 blog post ideas to help you overcome writer’s block.

    I’ve broken the blog post ideas down under specific niches, but you can use these ideas for any niche! Make them your own and get that blog post written today.

    blog post ideas

    Do you need help finding your blog niche? Click here to read all about blog niches.

    Blog Post Ideas for Any Niche

    Food blog

    1. Quick dinner ideas for busy families
    2. Easy after-school snacks
    3. Diet specific recipes (keto, low carb, low sodium, etc.)
    4. Best Instant Pot dinners
    5. No-bake dessert recipes
    6. Dinner ideas for date night
    7. Recipes with 5 ingredients or less
    8. Meatless Monday recipes
    9. Cookbook reviews
    10. Pinterest recipe fails
    11. Must-have kitchen gadgets
    12. Gift basket ideas for new bakers
    13. Growing your own herbs
    14. The best herbs you need for cooking
    15. How to organize your kitchen
    16. Restaurant reviews in your town, city, state, etc.
    17. Tips for food blog photography
    18. Getting your kids involved in the kitchen
    19. Holiday meals roundups (Christmas, Thanksgiving, Easter, etc.)
    20. Best holiday desserts (Christmas, Thanksgiving, Easter, etc.)

    Beauty blog

    21. Skincare for each season (Fall/Winter/Spring/Summer)
    22. Latest beauty trends
    23. Newest beauty products
    24. Best drugstore products
    25. How to choose colors for your skin tone
    26. Hairstyles that compliment your face shape
    27. How to organize your makeup drawer
    28. Best storage containers for makeup
    29. Easy updos for prom
    30. Best hair masks for dry, damaged hair
    31. Makeup product reviews
    32. Hair product reviews
    33. Skin product reviews
    34. Expensive makeup dupes
    35. Top beauty hacks
    36. Skincare routine
    37. Self-care routines
    38. Beauty stocking stuffers
    39. Top 10 drugstore beauty products
    40. Beauty trends to avoid

    Health/Fitness blog

    41. Top foods for reducing inflammation
    42. How to overcome the fear of judgment at the gym
    43. Walking plan to lose weight
    44. Best free fitness apps
    45. Yoga for beginners
    46. Meal tips for weight loss
    47. Habits to overcome when you’re trying to lose weight
    48. How to get motivated for exercise
    49. Best workout gear on Amazon
    50. The most comfortable leggings for working out
    51. Best stretches for runners
    52. Free YouTube workout videos
    53. Training together as a couple
    54. How to create a fitness plan
    55. How to fit in a workout on your lunch break
    56. Quick workouts for stay at home moms
    57. Creating a healthy meal plan
    58. Best playlists for working out
    59. What should you put in your gym bag
    60. Daily heart-healthy activities

    Parenting/Mom blog

    61. What to pack in your hospital bag
    62. Staying healthy during pregnancy
    63. Trendy maternity clothes
    64. How to care for a baby on a budget
    65. Best books for children
    66. Potty training do’s and don’t’s
    67. Family game night ideas
    68. Date night ideas for new parents
    69. Homeschool curriculum for all ages
    70. How to organize the playroom
    71. How to keep everyone sane on road trips with kids
    72. Summer activities with kids
    73. Fun craft ideas for kids
    74. How to bond with your baby
    75. How to bond with your teen
    76. Playdate ideas
    77. Setting boundaries for screen time
    78. Supporting your kids through grief
    79. Best books for preteens going through puberty
    80. How to cope with empty nest syndrome

    Lifestyle/Personal Development blog

    81.. Creating healthy habits at the beginning of the year
    82. Embracing mental health
    83. Creating morning habits for a successful day
    84. How to create a budget and stick to it
    85. How to overcome rejection
    86. 5 ways to be happier during winter
    87. Reduce anxiety and stress naturally
    88. Motivational/Inspirational quotes
    89. 50 date night ideas on a budget
    90. Bullet journal ideas you need to know about
    91. Simplify your life with these 7 productivity hacks
    92. Money-saving tips and tricks
    93. How you paid off your debt
    94. Movie night ideas
    95. Movie reviews
    96. Book reviews
    97. Holiday gift guides
    98. How to say “no” without feeling guilty
    99. How to be a happier person
    100. 10 ways to stick to your to-do lists

    Cleaning/Organizing blog

    101. 10 ways to organize your home quickly
    102. Organizing tips for the bedroom/bathroom/kitchen/living room
    103. How to clean up fast before company
    104. How to make your own natural cleaning supplies
    105. Fragrance hacks you need to try
    106. Top 10 cleaning hacks for the kitchen
    107. How to deep clean the bathroom
    108. Getting rid of that urine smell in the bathroom
    109. Best organizers for your bedroom/bathroom/kitchen/living room
    110. Tips for cleaning and organizing the garage
    111. How to clean and organize your basement
    112. Quick organizing tips for busy moms
    113. Quick cleaning tips for busy moms
    114. How to keep the house clutter-free when you have kids
    115. How to organize just about anything
    116. How to organize a bathroom so you can get ready quickly
    117. Things you shouldn’t keep in your refrigerator
    118. How to organize a pantry on a budget
    119. 10 things in your home that’s making you sick
    120. 5 motivational ways to clean when you just don’t feel like it

    Home Decor blog

    121. Dollar store hacks for small spaces
    122. How to make a small room look bigger
    123. 7 DIY decor ideas you can make on a budget
    124. Frugal home décor hacks
    125. Best color trends of the year
    126. How to add pops of color to your home
    127. 5 indoor plants that look amazing in your home
    128. Holiday decorating ideas
    129. Holiday home decor DIY’s
    130. How to style your living room
    131. 15 home décor ideas for your living room
    132. Home tour
    133. How to live through a home renovation
    134. How to style a shelf or tv stand
    135. Best patio décor ideas
    136. How to create a gallery wall
    137. How to use keepsakes in your modern décor
    138. Latest furniture trends
    139. How to paint furniture
    140. Top trending light fixtures for any home

    Travel blog

    140. Best ways to travel with kids
    141. What to take on vacation
    142. Hotel reviews
    143. Airline reviews
    144. Beginner traveling hacks
    145. Best destinations for couples
    146. Family-friendly destinations
    147. Cruise review
    148. How to plan a family vacation on a budget
    149. How to pack to save space
    150. How to save money while on vacation
    151. Carry-on bag checklist
    152. Best suitcases roundup
    153. Tips for traveling with a baby
    154. Must do road trip ideas
    155. Travel guide for your state
    156. 7 best places to travel this year
    157. Places to avoid while traveling
    158. Top 15 books for travelers to read
    159. What to pack for traveling overseas
    160. How to travel to a foreign country

    Personal Finance blog

    161. Understanding your electric bill
    162. How to conserve heat in the winter
    163. Best energy-saving lightbulbs
    164. Grocery shopping on a budget
    165. How to reduce food waste
    166. 55 ways to save money at home
    167. How to use coupons at any store
    166. Alternatives to eating out
    167. How to get by without using credit cards
    168. 25 ways to make money with side jobs
    169. How to make your own cleaning supplies to save money
    170. Gift ideas to make on a budget
    171. Tips for selling online
    172. How to watch your favorite tv shows without cable tv
    173. 20 ways to entertain for free
    174. Financial books you need to read today
    175. Top money mistakes young people make
    176. Creating a budget and sticking to it
    177. Budget tips for beginners
    178. Personal financial goals for the year/month
    179. Teaching personal finance to teens
    180. Teaching your kids how to save money

    Pro tips for overcoming writer’s block

    *Disclaimer: Affiliate links included. Click here to read more about what that means for you.

    • Keep a running list of ideas
      • Have a notes app on your phone and jot down blog post ideas as you think of them
      • Keep a notebook and pen close by so whenever you think of an idea you can write it down
      • Keep a blog post idea worksheet in your blog binder to write a running list on (You can get a free printable blog post idea worksheet in my free resources page!)
    • Write ideas on Post-It Notes
      • I stock up on Post-It Notes and stick them everywhere! I have them on my blog binder, in my notebook, and sometimes stuck to my computer.
    • Use your ideas as email topics, too
      • For example, if you write a bunch of posts about how to organize different rooms in your home, then send an email to your list titled “How to organize every room in your home”. Include your list of posts to get your readers involved.
    • Just start writing
      • Start writing a post and if it just sucks, then stop. Save it and come back to it later. Sometimes all it takes is a little time and a mood shift to come up with better content.
    • Keep writing
      • The more you write the more the blog post ideas will start flowing into your mind. Give it time and never give up!
    pin me
    blog post ideas
  • Branding Your Blog: A Step-by-Step Guide

    Do you want your blog to stand uniquely stand out from others? Are you ready to bring in lots of traffic to your blog? You need to put some time into branding your blog to make that happen!

    When I first started blogging way back when, I had no idea what branding your blog even meant! I was all over the place with my colors because I just wanted it to be “pretty.” It wasn’t until I realized I wanted to take my blog further that I started researching blog branding.

    After a total blog rebrand I started gaining more traffic to my site. I changed my theme, organized my menu, and stuck with just a few colors. Now I stay consistent with everything so my readers know exactly how to find me easily.

    Overall, I think my readers feel more comfortable coming to my blog and that has helped them gain a trusting relationship with me.

    branding your blog

    What is Blog Branding?

    Blog branding is not just your logo. It’s how people recognize you and your blog and/or business. You want to stand out from others and you need to be remembered. This is why it’s so important to put time into branding your blog.

    For example, say you are scrolling through Pinterest and you see a lot of similar pins from a certain blogger, or business. Their pin colors, styles, and fonts are always similar. After a while when you see that pin style you immediately know who created it. That’s their brand.

    Blog branding is all about your color scheme, the fonts you use, your overall theme, your logo design, and your graphics. And I’m going to show you how to put all of those together so you can start branding your blog today.

    Steps to Branding Your Blog

    *Post contains affiliate links which means I’ll be compensated if you make a purchase. Click here to read more.

    1. Tell your story

    All great brands start with a story. You need to let people know exactly who you are and what you do. Having a clear brand keeps readers on your site longer because they’ll know exactly what to expect from you.

    Ask yourself these questions when considering your story:

    • What is your blog’s focus? (This is your blog’s niche. If you need more information on finding your niche, click here.)
    • Where do you see your blog going in the future?
    • Who are you writing for? Who is your target audience?
    • What problem are you trying to solve for your audience?

    Writing down your blog’s story is so important for creating a vision for your blog’s brand. Consider creating a vision board for your blog. (I’ll talk about that more later.)

    2. Choose your color scheme

    Usually, you’ll choose your color scheme before designing your blog. To help with choosing colors that go together, search Pinterest for “color scheme” or just do a Google search.

    Typically you should choose 2-3 primary colors and 2-5 secondary colors. The primary colors will be used for your logo and all the main elements for your branding. The secondary colors are used for website links and marketing materials.

    You want your color scheme to be memorable and create a positive impression. The colors need to have the power to connect with your audience and draw them in.

    Ask yourself what you want to achieve with these colors. A feeling? The need to reach your targeting audience? Or is it just about getting noticed?

    3. Choose your fonts

    It’s super important that the fonts you choose are easy to read and can be seen on mobile phones. Cursive fonts or fonts that are too small or light in color are difficult to read. This turns readers off and they’re not going to stick around if they can’t read your amazing work.

    Sans-serif fonts are the most pleasing to the eye. Also, be sure to stick with black on a white background for comfortable reading.

    You can get more creative with fonts in your titles and subtitles because these are bigger than the text in your paragraphs. Because they are bigger, they are easier to read. To help with font selection, check out Canva. They have a fonts section that shows you fonts that go well together.

    4. Create your blog’s theme

    WordPress has some very professional pre-designed blog themes, both free and paid. Most of these themes allow you to change colors, fonts, layouts, etc., allowing you to make it your own.

    There are also a lot of really nice paid themes out there. These are so great because all of the work has been done for you – the hardest part is choosing the one that fits you best. One of my favorite themes is the Neira WordPress Theme. I love the sleek design and all the different layouts you can choose from. Check out VolThemes.com for more fun designs.

    5. Create your logo design

    I personally believe having a logo is super important for branding your blog. It sets you apart from others and lets your targeted audience and readers know who you are.

    Your logo goes at the top of your website, in your favicon, on your business cards, and in your email signatures. Logos should include your name, your brand name, or your company initials. It’s also very important to keep your color scheme going with your logo.

    The logo design that you choose needs to be unique and consistent. Use the same logo for everything, don’t mix it up. This will only confuse your readers.

    My best tips for branding your blog

    • Be welcoming. Your color scheme, layout, and menu should feel familiar and comfortable to your readers. Make it easy for them to find what they are looking for.
    • Be consistent. Make sure you are being consistent with your colors, images, tone, graphics, etc. You want your readers to be able to find you easily.
    • Your tone matters. Your brand is characterized by the tone of voice you use when talking to your audience. For example: energetic and bubbly or serious and ambitious.
    • Know your competition. Check out your competition for inspiration, but don’t copy them. What is their logo? Their colors? What is their message and marketing strategy?
    • Know your audience. Knowing who your ideal audience is will really help with branding your blog. When you really consider your audience, you’ll be able to “talk” to them through your brand. They’ll feel comfortable with you and they’ll feel like they really know you. This is the beginning of a trusting relationship, which is also very important for your blog.
    • Create a vision board. Use a poster board or a notebook to create a vision board for how you want your brand to look. Include the color scheme and fonts you wish to use as well as a drawing of your theme layout. Write out your blog’s story and put that on the vision board, too. Add your logo, blog name, and tagline so you can see it all come together.

    To recap, branding your blog is very important if you plan to monetize your blog. It brings in traffic and makes it easier to grow your audience list. Having a consistent brand shows you’re trustworthy and know exactly what you want.

    Having a brand also makes it easier when it comes to creating Pinterest graphics as well as creating emails for your email list.

    pin me
    branding your blog
  • Contact Page: Why You Need It & How-To Create It

    A lot of bloggers think a contact page isn’t necessary. But they’re wrong. Keep reading to find out why you need a contact page and how to create a stunning one for your blog.

    So far we have created some very important pages for our blog including an “About” page, a “Start Here” page, a “Privacy Policy” page, and a “Disclosure” page. Today we’re going to create a contact page.

    So many bloggers think that a contact page isn’t necessary for their blog. However, they are more than likely missing out on potential customers, guest writers, and collaborators.

    Having a contact page is very important no matter what size your blog is. Especially if you want visitors and readers to get in touch with you.

    contact page

    To see all the important pages every blog should have, click here.

    Why do you need a contact page?

    Other than the reasons mentioned above, a contact page:

    • Protects against spam: Putting your email address on your website leaves you open to receive tons of spam emails. Spambots are constantly scanning for the email address tag on websites.
    • Saves time: Form confirmations can be used to send people their next steps, such as a landing page, a video, or just a simple note telling them you’ll get back with them soon.
    • Potential opportunities: A lot of times, if there’s no way to get in touch on your site, people leave and don’t come back. This means you’re missing out on potential guest writers, collaborators, customers, and readers.
    • Gathers reliable information: People don’t always provide you with all the details when they send you an email. However, with a contact form, you can tell them exactly what you need from them. You can require their email, phone number, and more. You can also include a dropdown box so they can choose the topic.

    What should the page have?

    An effective contact page should be a basic page and only include the following:

    • Contact form: Obviously. This is the easiest and safest way for people to get in touch with you.
    • Social media links: If you plan to have people communicate with you through social media, then include your links on this page as well.
    • Photo: While this is not a requirement, having a photo on your contact page will make your blog stand out and look stunning!

    Set expectations for form users

    • No matter what size your blog is, you should let readers know right away that you will not be able to respond immediately. You can include this in your confirmation message, or somewhere on your page. I include a simple statement in my confirmation message that says, “I will respond shortly.”
    • Make it clear which emails you will not respond to. For example, anyone that seems spammy, or anyone that is just being plain rude. You don’t have to respond to every single email.
    • Have visitors check your FAQ’s page before they send you their questions.

    Best Contact Page Tips

    • Double-check for grammatical and spelling errors.
    • Keep it simple. This is the most basic page on your blog. It’s doesn’t need to be filled up with a ton of information.
    • Only require name, email address, and message on the form itself. Some people do not feel comfortable sharing all of their information with you.

    How to create a simple contact form

    There are a lot of different plugins that you can get for free through WordPress for contact forms. The form I use is WPForms Lite. It’s free and easy to use. It’s beginner-friendly and includes drag and drop options. If you need more features you can always upgrade to the paid version.

    For this example, I’ll be using this form so you can see how easy it is.

    Creating a contact form step-by-step

    1. Install the plugin

    The first thing you need to do is to install the WPForms Lite plugin. Go to plugins, then click add new. Search for “WPForms”, click “install now”. Once the plugin has been installed, click “activate”. (Just as an FYI: the picture for the plugin is a bear waving.)

    2. Create the form in WordPress

    Inside your dashboard, click WPForms on the left sidebar, and then click add new.

    You’ll see a page to select a template. Choose the template you want to use. For this example, I’m going to use the “Simple Contact Form”, which just includes the name, email, and message fields. However, you can edit the fields any way you like or even change their order by dragging and dropping them.

    When you’re done, click save.

    3. Setting notifications and confirmations

    Form confirmation is what the person sees after they submit the form. This could be a simple thank you message, or a redirect to a certain page on your website. There’s already a default message set up, which you can change if you wish.

    Form notification is the email you get after a person submits the form. The notifications will go to the admin email that you have set up on your website. If you want to send the notification to a different email, change it in the “send to email address” field.

    4. Add the form to a page

    Create a new page in WordPress and give it a name, such as “Contact Me” or “Contact Us”. In the body of your page, you can include a short and sweet message, then add the form.

    To add the form, simply click the arrow to add a new block, then search for WPForms. Click it to add it to your page, then in the dropdown menu click the form you just created. Then click Publish at the top right of your page and you’re done!

    So, to recap, don’t underestimate the importance of having a contact page on your blog. You will be missing out on potential customers, collaborators, readers, and guest writers without one. There should be a way for visitors to get in touch with you with any questions or suggestions they may have. And you should want to welcome that to build a relationship with your audience.

    pin me
    contact page pin
  • Disclosure Page – Disclosures You Need on Your Site

    If you are running a monetized blog, then you are required by law to have a disclosure page. I’ll cover exactly what that means in this article. And I’ll also share two different templates for you at the end of the post.

    So far we’ve created a “Start Here” page, an “About Me” page, and a “Privacy Policy Page” for our blog. Today we’re going to create a “Disclosure Page” and learn more about what disclosure is exactly.

    Blogging can be a lot of fun and a little bit addicting. You’re in control of what you say and do and there’s no boss to answer to. You are the boss here!

    However, just because you’re deciding what you write about doesn’t mean you don’t have to include all the legal stuff. And if you live in the United States and run a monetized blog, then a disclosure page is an absolute must. It’s a legal requirement you need to stay out of trouble.

    disclosure page

    Click here to read about all the important pages your blog needs.

    Disclosure vs. Disclaimer

    Before we get started on your disclosure page, you may be asking yourself what the difference is between a disclosure and a disclaimer. Here’s the simple version:

    Disclosures provide your readers with all the necessary information regarding a purchase or promotion. It’s giving your audience a head’s up that you will get paid if they make a purchase through your links.

    Disclaimers let your readers know that you are just sharing information and it’s up to them what they do with that information. Basically, it’s a statement denying your responsibility.

    What is a Disclosure Page for Blogs?

    As mentioned above, a disclosure page for blogs is a written statement that lets your readers know about any relationships you have with brands, products, and partners mentioned on your site. It shares that there is a relationship between you and what you are promoting and there is money involved.

    Not only is a disclosure page a legal requirement, it also creates transparency between you and your readers. This builds trust between you and your audience, which is necessary to run a successful blog.

    Why is it required?

    If you plan to monetize your site through ads, affiliate links, email marketing, selling products, or sponsored posts, then you are required to have a disclosure page.

    Disclosures limit your liability on your content, meaning they help you stay legal and out of trouble.

    The FTC (Federal Trade Commission) has established policies that you must follow in order for your blog to remain legal. These policies allow your readers to know and understand that you will be paid for sharing certain information.

    You can read the full report here so you can understand what is required by law. I highly recommend reading it all very closely.

    Types of Content Requiring Disclosures

    Any time you share a product, company, or band that you will be paid for, then you must include a blog disclosure. This can be a simple statement at the top of your page, but it should link to a disclosure page that has more information.

    Here are two examples of when you can add the simple statement to the top of your posts:

    1. Sponsored posts

    Sponsored posts are posts that you are writing for someone else, such as a brand, and getting paid for. For example, a certain brand of soap sends you their product to try and will pay you to write a post about it.

    You are required by law to let readers know that this is a sponsored post. They need to understand that before they click your link to buy the soap for themselves.

    2. Affiliate links

    Affiliate marketing is where a lot of bloggers make money. Adding a link to a product that your readers may purchase requires a disclosure since you will get paid if they buy the product. For example, writing a post about your favorite farmhouse wall décor and adding links to Amazon for readers to purchase.

    Where do you put a disclosure statement?

    When you write a sponsored post or a post with affiliate links, a blog disclosure statement must be placed as close to the link as possible. Your reader has to see the disclosure before clicking the link.

    A link to your disclosure page must be visible on every page. It’s best to add it to a menu or your website’s footer. I include a link to mine in the footer. Also, you need to add a link to your disclosure page in your disclosure statement.

    Sponsored posts

    For sponsored posts, a simple disclosure statement can be added to the top of your post before your blog content. For example: “This is a sponsored post on behalf of (company name). All opinions are my own.”

    If you plan to share your sponsored post to Instagram, Twitter, or Pinterest then you also have to share a disclosure statement there. A simple way of doing this is to use the hashtags #sponsored or #ad or both. This lets readers know that you were paid to write the post before they read it.

    Sharing a sponsored post to Facebook also requires a disclosure statement, but you have to go about it differently. They have policies that you must follow or your post will be removed or they can even shut down your entire account. (This is another reason I do not use Facebook for my blog.)

    To share a sponsored post on Facebook you first have to apply to have branded content on your own page. To do this, you must follow these steps:

    1. Visit the branded content tool page
    2. Select the page you want to use
    3. Click send

    It takes up to 2 business days for them to respond. You can read more about Facebook Branded Content here.

    Affiliate links

    Affiliate links also require a disclosure statement, which should be as close to the link as possible. Just typing “affiliate links” somewhere in your post is not enough. You have to let your readers know that your content has affiliate links and you will be paid if they make a purchase through one or more of your links.

    For example: On my lifestyle blog, I write a short introduction, then a header before my main content. I know my affiliate links will be in that content, so I include a short disclosure statement saying “Posts contain affiliate links. I may be compensated if you make a purchase through one of the links. To learn more about what this means for you, click here.” I include a link to my disclosure page in the word “here”.

    Amazon has its own disclosure statement that you must include somewhere on your site. You can copy this statement and put it directly in your disclosure page, or put it on your site’s sidebar or in the footer. You can read about that here, under #5: Identifying Yourself as an Associate.

    How to Write a Disclosure Page for Your Blog

    Now that we have went over what a disclosure page is, why it is required, and where you should put a disclosure statement, let’s learn how to write one.

    Here are some disclosure page examples that I love.

    Example #1

    “This blog is a personal blog written and edited by me. We accept forms of cash advertising, sponsorship, paid insertions, or other forms of compensation.

    Also, this blog abides by word of mouth marketing standards. We believe in honesty of relationship, opinion, and identity. The compensation received may influence the advertising content, topics, or posts made in this blog. That content, advertising space, or post will be clearly identified as paid or sponsored content.

    The owner of this blog may be compensated to provide opinion on products, services, websites, and various other topics. Even though the owner of this blog receives compensation for our posts or advertisements, we always give our honest opinions, findings, beliefs, or experiences on those topics or products. The views and opinions expressed on this blog are purely the bloggers’ own. Any product claim, statistic, quote or other representation about a product or service should be verified with the manufacturer, provider, or party in question.

    This blog may contain content which might present a conflict of interest. This content will always be identified.”

    Example #2

    This blog accepts forms of cash advertising, sponsorship, paid insertions, or other forms of compensation. Any paid or compensated content will be clearly distinguished as such. All opinions are, and will always be, my own.

    Any product claim, statistic, quote, or other representation about a product or service should be verified with the manufacturer or provider in question.

    Also, this blog also publishes affiliate links. An affiliate link means I may earn a commission if you make a purchase through my link, without any extra cost to you. (Thank you for your support!)

    You can use these as a reference, but please make your disclosure page your own. It should come from you with your writing personality. But it should include all the legal requirements and don’t forget to add in the Amazon statement if you are an Amazon affiliate.

    I don’t make a full separate disclosure page for my blog. I include it at the bottom of my Privacy Page. You can do this, as well, or you can make it a full page. It’s entirely up to you how you do it as long as you do it.

    pin me
    disclosure page
  • Privacy Policy Page – Why You Need One

    A privacy policy page is a must-have for bloggers, so don’t skip this page. In this article, I’ll go over why a privacy page is so important as well as show you how to create one.

    Your blog has been created and you have some posts written. You’re good to go, right?

    Not so fast.

    Every blog needs a privacy policy page in order to comply with state, federal, and global laws. These laws protect consumer privacy rights in every state.

    Refusing to follow these laws can land you some hefty fines.

    But, don’t worry. Creating a privacy policy page for your blog isn’t difficult and can be done fairly easy. I’ll show you how!

    First, let’s go over what the heck this page even is.

    privacy policy page

    To read about all the important pages your blog should have, click here.

    What is a privacy policy page?

    Whenever you visit any website, you are leaving behind pieces of information. This includes your name, email address, IP address, and more.

    The purpose of this page is to disclose:

    • what information the website collects
    • what the website does with collected information
    • who else has access to that information
    • how the information is protected
    • how long the information is kept

    Creating a privacy policy page protects you from legal liability and protects your readers from any potential privacy breaches.

    Since just about every website you visit is collecting privacy information, you need to be protected.

    How blogs collect private information

    Blogs are no different that other websites when it comes to attracting an audience. We all want our audiences to eventually convert to subscribers. To do that, we have to collect their names and email addresses.

    However, that’s not the only way blogs collect private information from readers. The list goes on and on.

    How private information is collected:

    • List sign up forms (so readers can sign up for your email list)
    • Contact forms
    • Chat tools (require email or other personal information)
    • Social sharing tools (anytime a reader shares your blog post)
    • Comment form
    • Ecommerce (for online stores)
    • Cookies (most websites require that you accept the cookies)
    • Third party services (such as ads)

    If your blog has one or more of these items (and most likely it does) then you must have a privacy policy page to comply with the rules.

    How to create a privacy policy page

    To begin with, let’s go over what this page should have and do.

    A privacy policy page should:

    • be well written and easy to understand
    • identify all the possible ways your blog is collecting readers’ personal information
    • include information you collect directly (ex: pop-up forms) and indirectly (ex: ads)
    • acknowledge your respect for and regard to all applicable laws

    My favorite way to create a privacy page is with a privacy policy generator. This is so simple – just fill out some information and the generator does all the hard work for you.

    The generator I use for my page is PrivacyPolicies.com. It’s super simple and the best part is that it’s free to use!

    After filling out all of the required information, you have the option to download it or copy and paste it right into your page.

    They also offer free clauses for analytics tools and ads. If you want anything extra, you will have to pay for it.

    Where to place the page on your blog

    After you’ve created your privacy policy page and published it, you want to make sure it is somewhere that it can be seen. This can include your footer, your sidebar, or in a secondary menu. A link to the page can also be placed in a sub-menu as a drop-down under your “about” section.

    You must familiarize yourself with all the legalities if you are serious about running a successful money-making blog.

    Favorite Resouces

    GDPR – “What is GDPR, the EU’s new data protection law?”

    Privacy Policy Requirements for a Blog

    pin me
    how to write a legal privacy policy page
  • Creating an Amazing About Me Page

    Do you really need an about me page for your blog? We’ll cover that answer and more in this article on creating an amazing about me page.

    You may be asking yourself if an ‘About Me’ page is really important for your blog. Guess what? It is!

    An ‘About Me’ is usually where potential clients go first because they want to learn more about who you are what it is that you do.

    This page is also a great way to promote your brand.

    The con of writing an ‘About Me’ page is that it’s not exactly easy to do. However, if you follow my tips you will be creating an amazing ‘About Me’ page with no problem whatsoever.

    creating an amazing about me page

    Why do you need an ‘about me’ page?

    Believe it or not, your ‘about me’ page isn’t about you at all.

    It’s about the person who clicked on the link to get to the page.

    Consider your ‘about me’ page your interview with your readers. You are working on building a trusting relationship and connecting with your readers. Also, you want them to understand exactly why they need you to help them over anyone else.

    What exactly is an ‘about me’ page?

    Most of the time the ‘about me’ page is the first page a new reader visits. So it’s very important to have a link to this page somewhere you know readers will see it immediately. It’s also usually the most visited page on your site.

    Whenever a new visitor comes to your site they want to learn more about who you are as a person or as a business. They want to hear your personal story as well as how your business came to be. This page is where you will build trusted relationships with your readers and keep them coming back.

    An ‘about me’ page is your chance to connect with your audience and keep them intrigued. You want to convince them you are the person they should be working with. You need to include your bio, your credentials, and your story.

    Creating an amazing about me page step-by-step

    Step 1: Trigger a feeling

    The very first thing you want to do when writing an ‘about me’ page is to grab the reader’s attention immediately. This can be done with a statement that triggers a feeling in the reader.

    Let the reader know that you understand why they visited your site. Ask questions about your business and if the reader answers “yes” to more than one question, they know they are in the right place.

    Example: Are you always to busy to elaborate meals? Are you constantly too tired to cook? Are you eating out more than eating at home? Then you’re in the right place!

    Step 2: Get into their heads

    The second section an ‘about me’ page should allow people to decide whether or not you are the right one for them. Use empathy to get into their heads and make them believe you really understand them.

    Stir up their emotions and really get them on your side.

    Example: “You’ve tried everything to lose weight and nothing is working. You’ve cut out carbs and sugars and it’s still not working. It’s frustrating and depressing. Believe me – I get it! I’ve been there, too!”

    Step 3: Brag through others

    Sure we can brag on ourselves all day, but other people get sick of that eventually. What they want to know is what other people are saying about us.

    What other people are saying about us speaks louder than what we can ever say about ourselves.

    While you are creating an amazing ‘about me’ page for your blog, add a section of testimonials and social proof of others speaking for you. This lets your readers picture themselves as part of your community.

    Example: “What others are saying about me.”

    Step 4: Add your bio

    Once you have proven to your audience that you deeply care about them, tell them more about yourself.

    Make a personal connection with your readers by

    • stating why you do what you do
    • stating your mission
    • using a short story to sum up your background (make it memorable)
    • including a photo or 2 of yourself

    People connect with other people. They want to see faces and learn names.

    Step 5: Ask them to keep in touch

    To make sure your readers are going to stick around, ask them to keep in touch by signing up for your email list. You could offer an incentive to get them even more excited to join, such as a free resource or ebook.

    Include multiple options for readers to sign up for your email list throughout the page. Your first option should go under the second section – after you’ve told them exactly why they need you. The next option should be after your testimonials and social proof and the last option should be at the very end of the page.

    My best tips:

    • When creating an amazing ‘about me’ page you want to use your own writing voice.
    • Don’t be afraid to use a little humor, just don’t overdo it.
    • Make sure you include your name and your credentials.
    • Add a photo to let your readers see what you look like because this builds trust.
    • Don’t drag your story out, get to the point.
    • Remember: your ‘about me’ page isn’t about you at all.
    • Talk to the readers about:
      • why they should be on your site
      • the problems you solve
      • how you can help them
      • what they are interested in

    Grab your FREE checklist here!

    arrow

    creating an amazing about me page checklist
    pin me
    creating an amazing about me page
    creating an amazing about me page