You’ve signed up for web hosting, but now what? Now you need to install WordPress!
Knowing how to install WordPress is the next crucial step before your website or blog can go live. But it can be scary, especially if you’ve never done it before.
In this guide, I’ll walk you through simple, step-by-step instructions—from one-click installation to a manual overview—and show you exactly what to do immediately after WordPress is installed. By the end, you’ll have a secure, functional site ready to customize and grow.
(Already deciding on hosting or choosing between WordPress.com and WordPress.org? Check out our guides on the best hosting sites and starting a blog from scratch.)
Option 1: How to Install WordPress with One-Click Installation
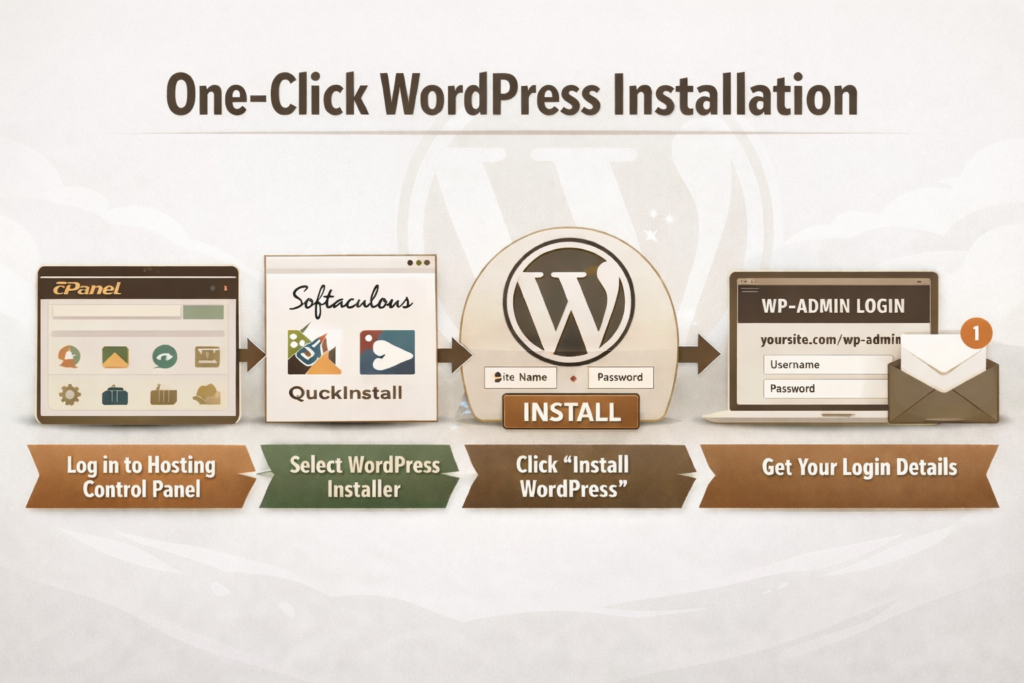
Most web hosting providers today offer one-click WordPress installation. This is the easiest way to get started:
- Log in to your hosting (i.e., Bluehost) account’s control panel (cPanel or similar).
- Look for a WordPress installer—common options include Softaculous, QuickInstall, or Fantastico.
- Click “Install WordPress” and follow the prompts (site name, username, password, and email).
- Once complete, you’ll receive your WordPress login URL—usually something like yoursite.com/wp-admin.
That’s it! You now have a fully functional WordPress site ready for customization.
Option 2: Manual WordPress Installation (Overview)
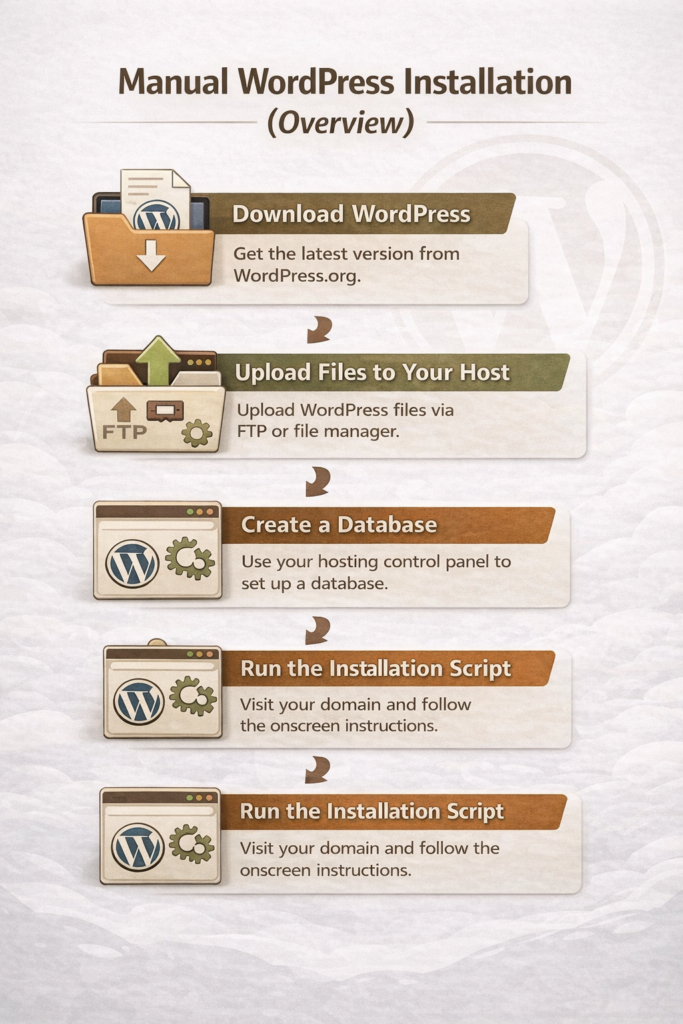
If your host doesn’t offer one-click installation, you can install WordPress manually:
- Download WordPress from WordPress.org.
- Upload the files to your hosting server via FTP (File Transfer Protocol).
- Create a database in your hosting control panel.
- Run the installation script by visiting your domain in a browser.
Manual installation gives you more control, but it’s a bit more technical. Most beginners will find the one-click option faster and simpler.
What to Do Immediately After Installation
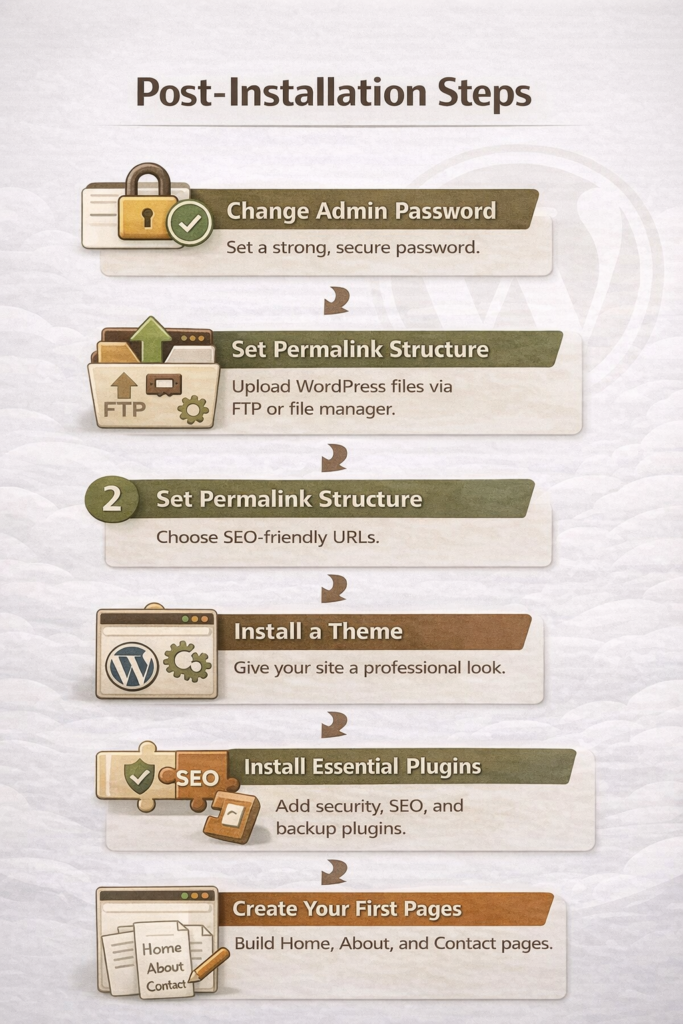
Once WordPress is installed, there are a few essential steps:
- Change your admin password to something strong and secure.
- Set your permalink structure (Settings → Permalinks) for SEO-friendly URLs.
- Install a theme to give your site a professional look.
- Install essential plugins like a security plugin, SEO plugin, and backup plugin.
- Create your first pages to get your site live.
Following these steps ensures your WordPress site is secure, functional, and ready to grow.
Final Thoughts
Installing WordPress can feel intimidating at first, especially when you’re not sure what the “next step” is after signing up for hosting. The good news is that most beginners can get up and running quickly using a one-click installation, and even the manual option is manageable when you understand the process at a high level.
Once WordPress is installed, the real work begins—setting up your site, securing it, and creating content that serves your readers well. Take your time, follow the steps in this guide, and remember that you don’t need to do everything perfectly on day one. A simple, functional site is far better than waiting indefinitely for the “perfect” setup.